
This is how you give ChatGPT access to your CompLeadly account via MCP: In CompLeadly, go to Settings → MCP and copy the server URL. Then, in ChatGPT developer mode, create a new connector with this URL and connect it using a personal access token created in CompLeadly.
Video tutorial (written instructions below)
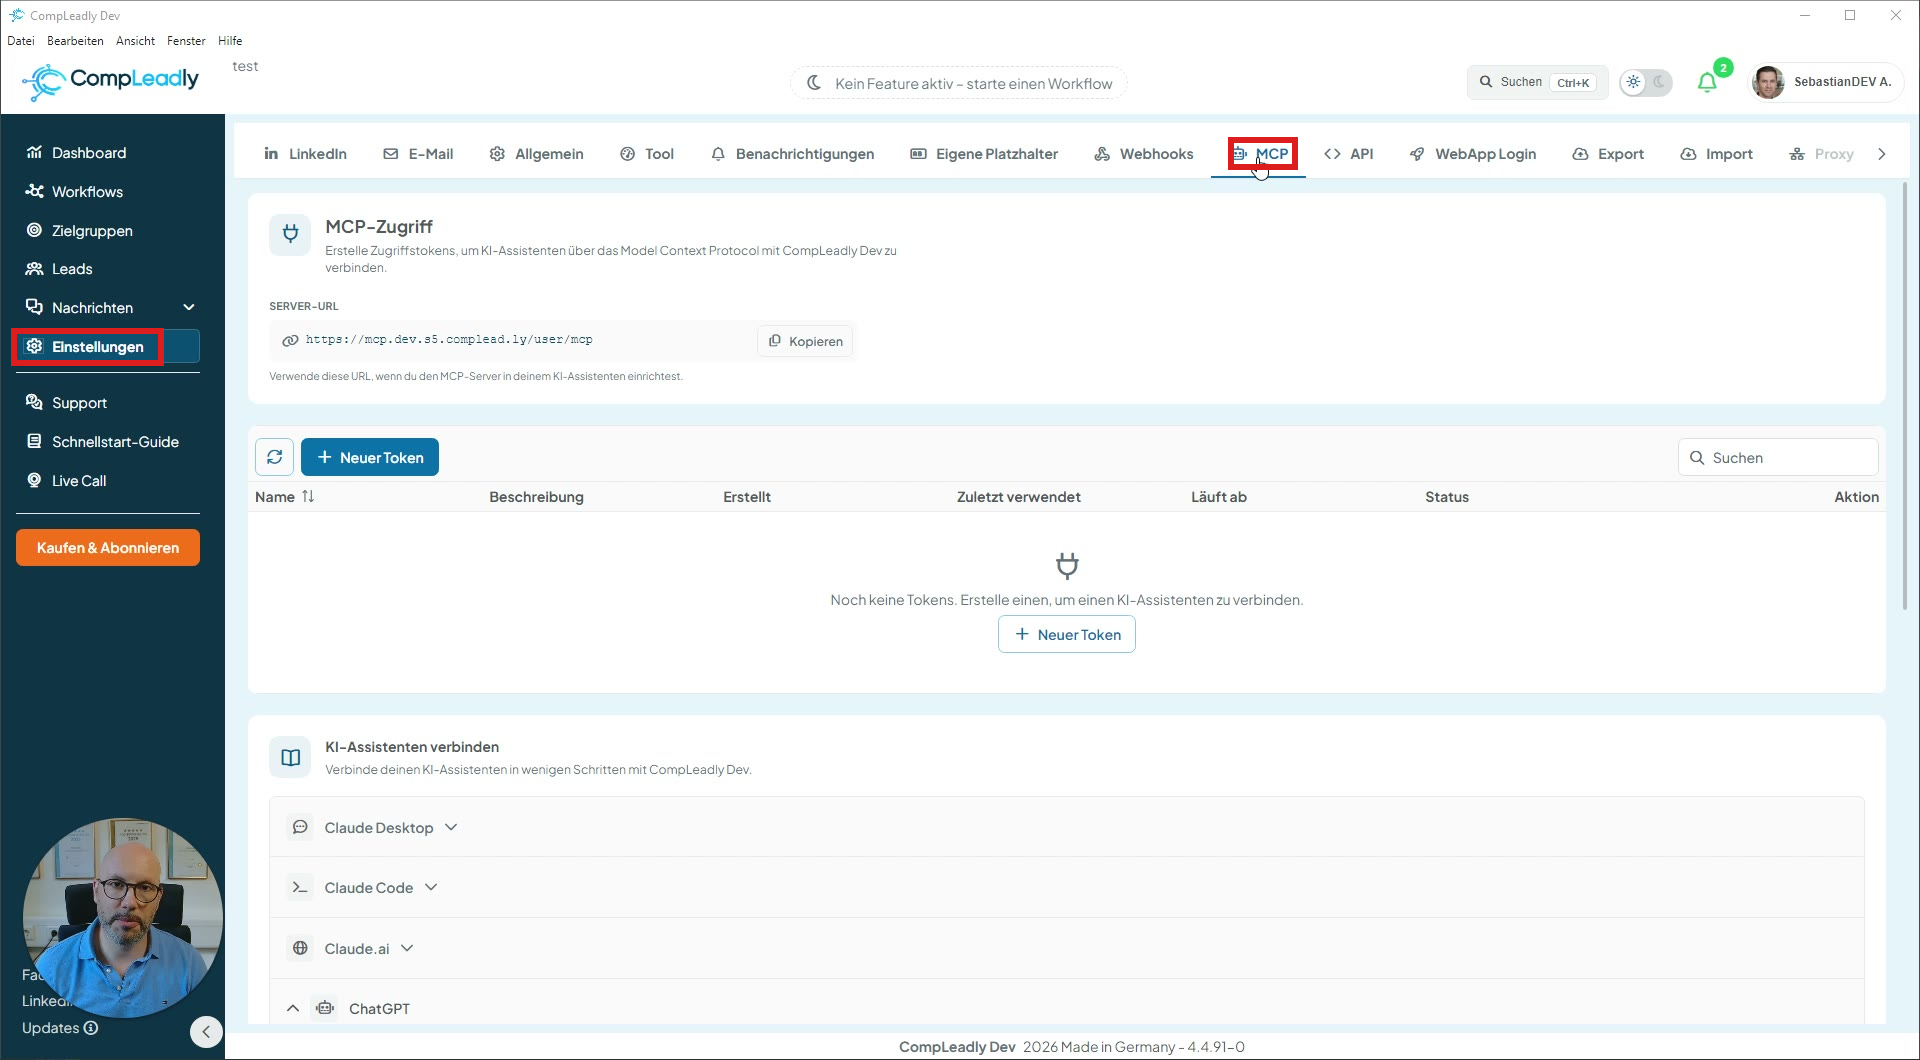
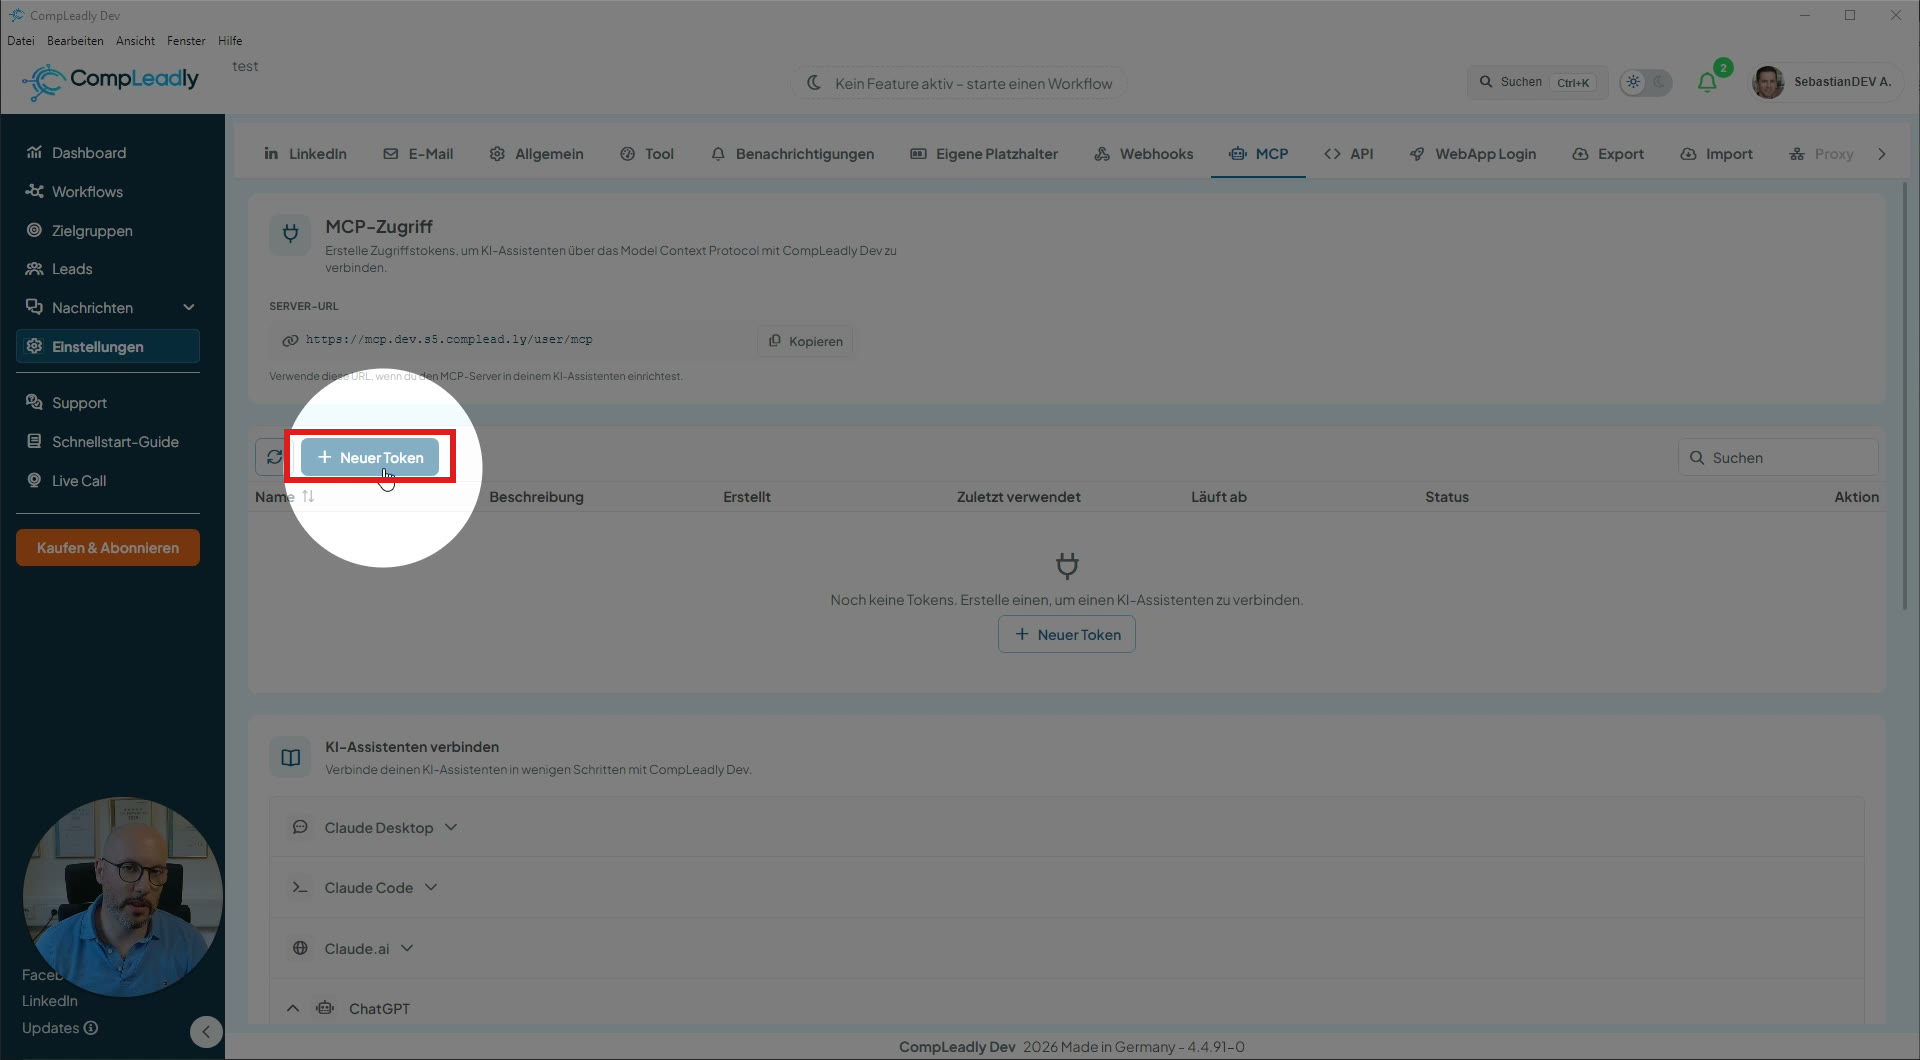
Step 1 – Go to the MCP settings in CompLeadly
In the menu on the left, go to Settings and click the MCP tab at the top.
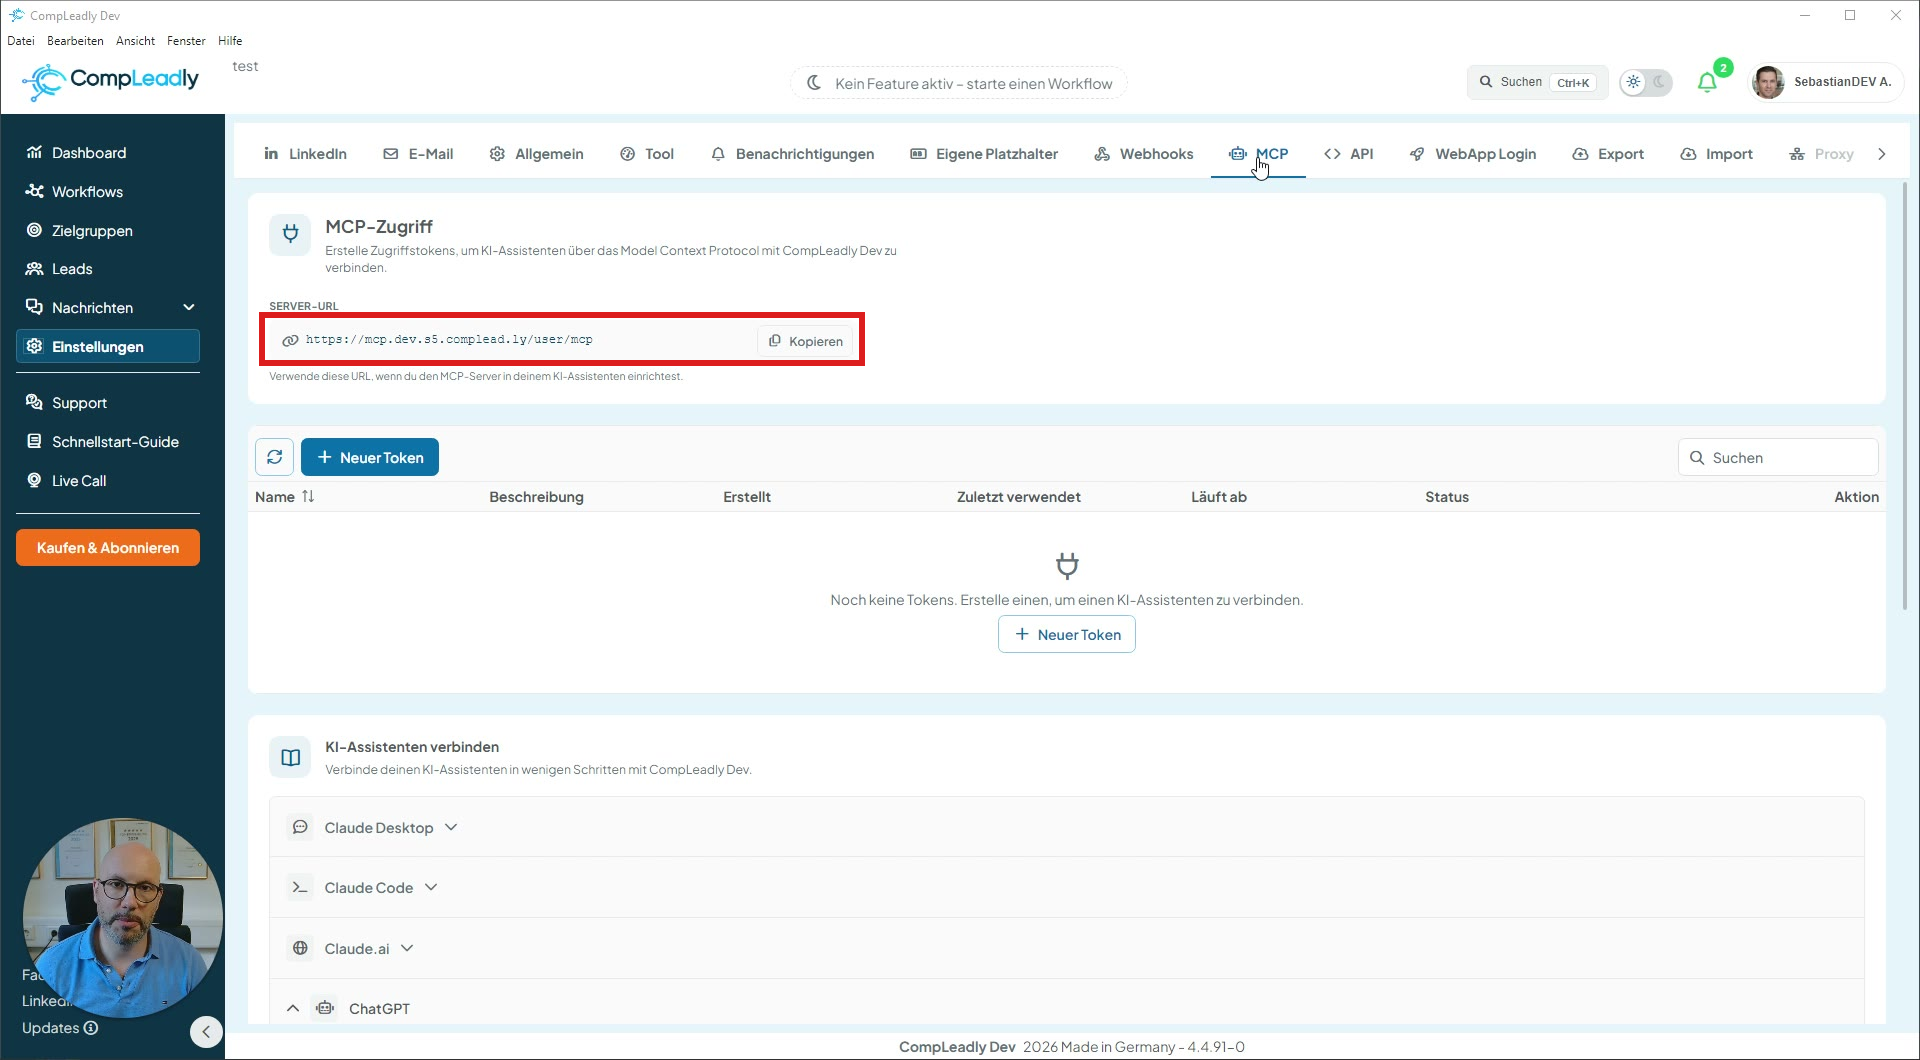
Step 2 – Copy the server URL
Under MCP access, you will find the server URL. Click Copy — you will need this URL in ChatGPT shortly.
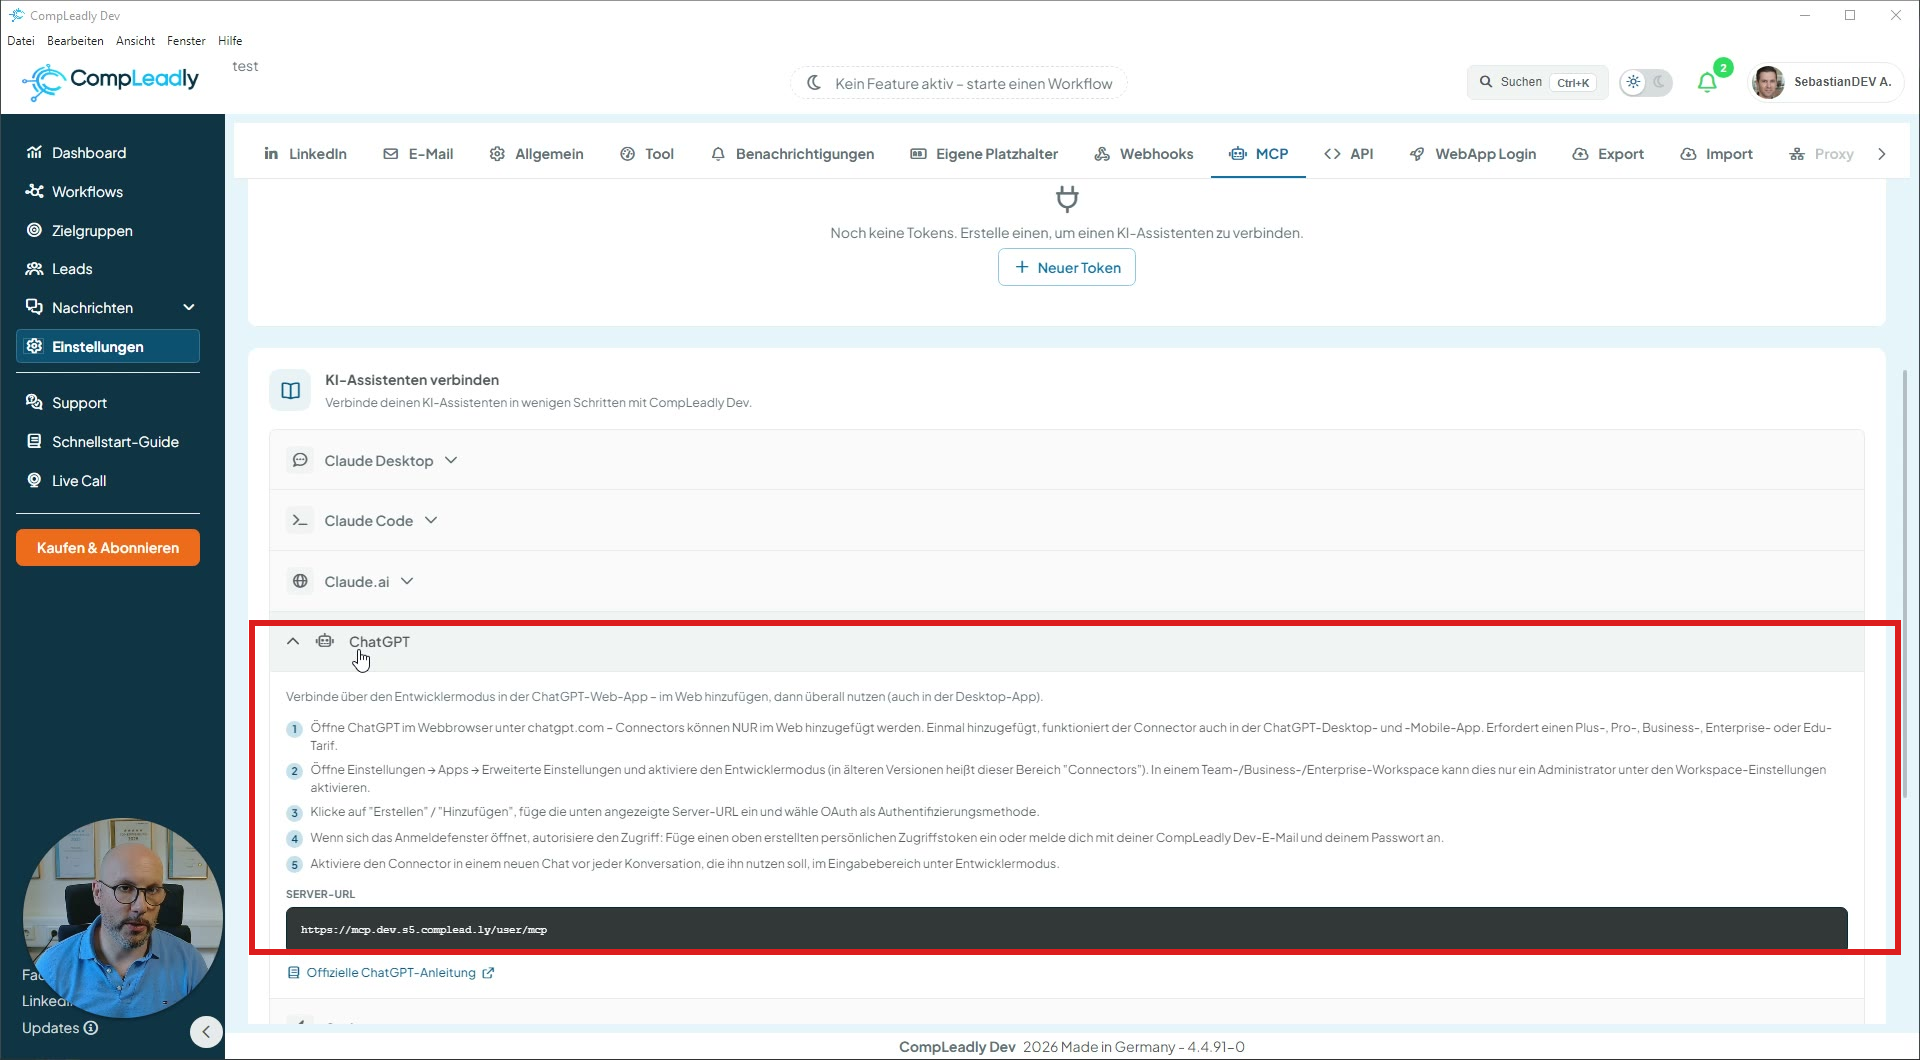
Step 3 – Built-in ChatGPT guide (for orientation)
Further down the page, under Connect AI assistants, you will find the full step-by-step guide, including the server URL, under ChatGPT. You can use it as a reference at any time.
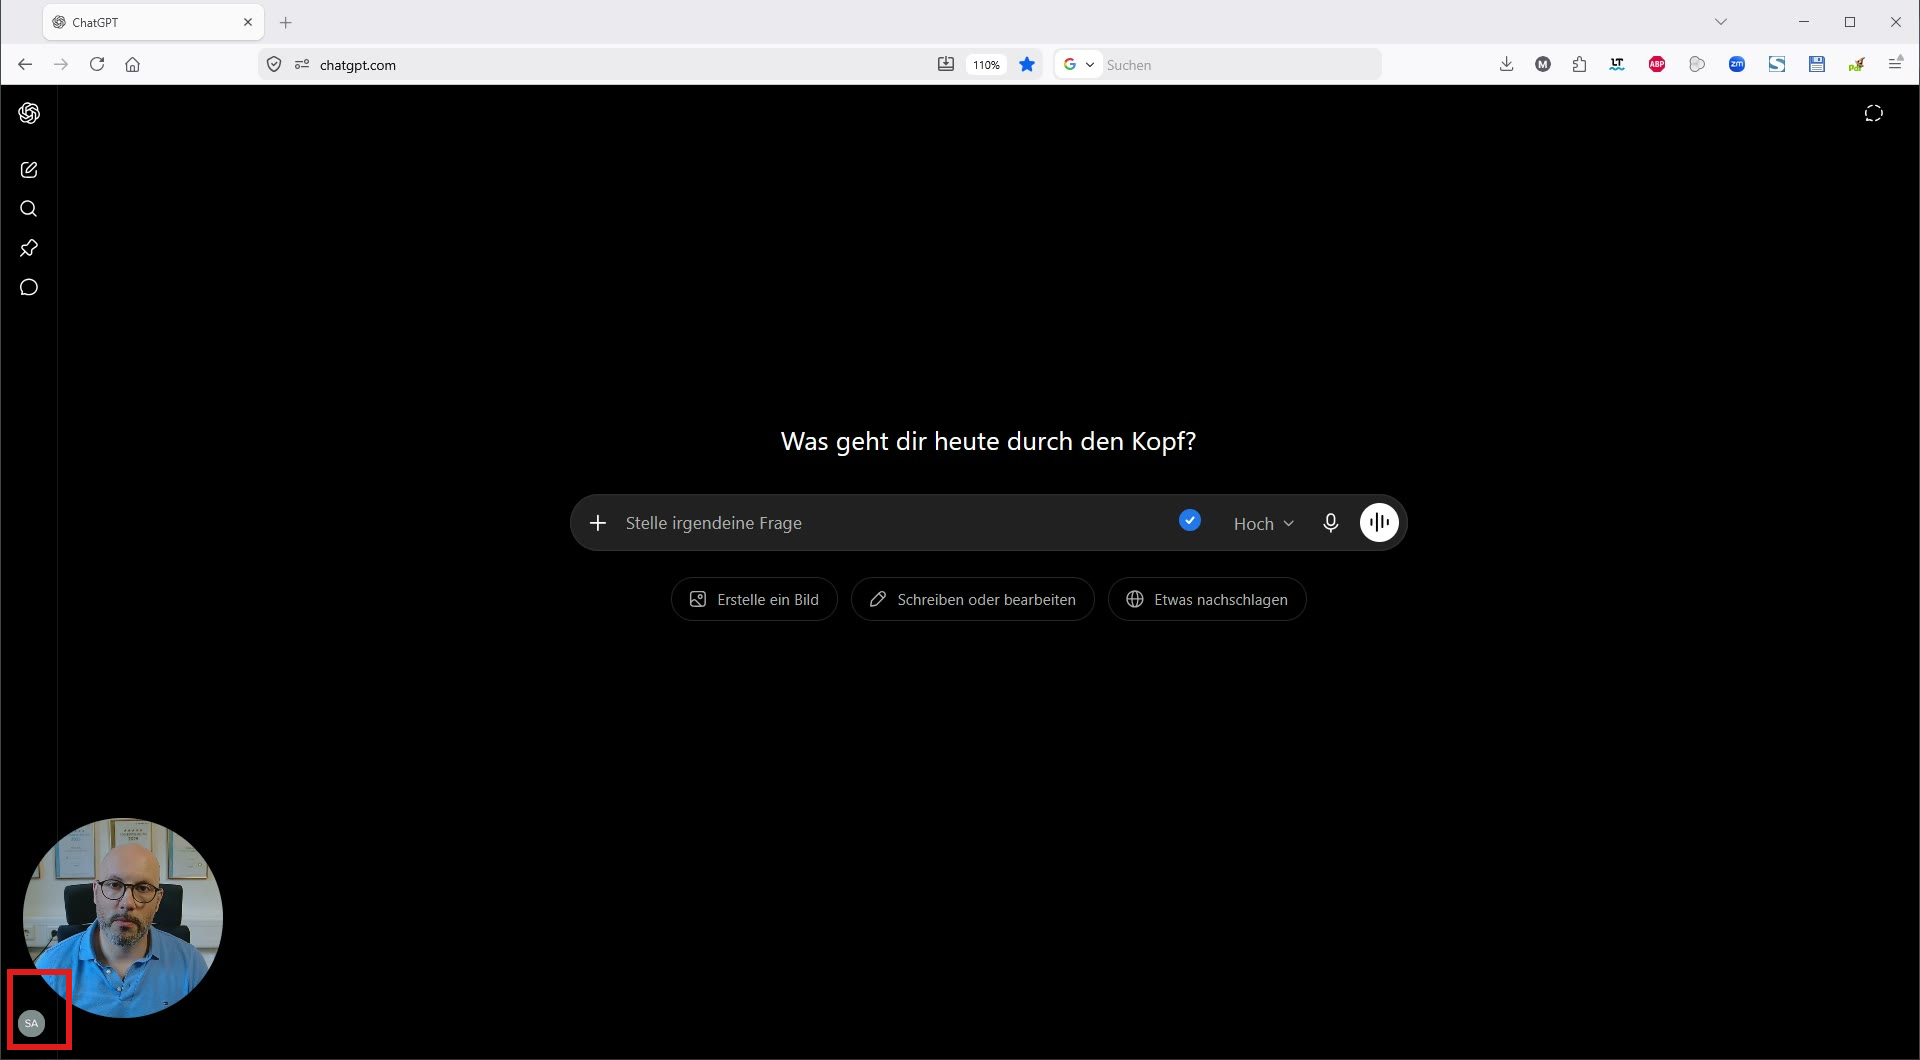
Step 4 – Open ChatGPT in your browser
Open ChatGPT in your web browser (chatgpt.com). Click your profile in the bottom-left corner to go straight to Settings.
Step 5 –
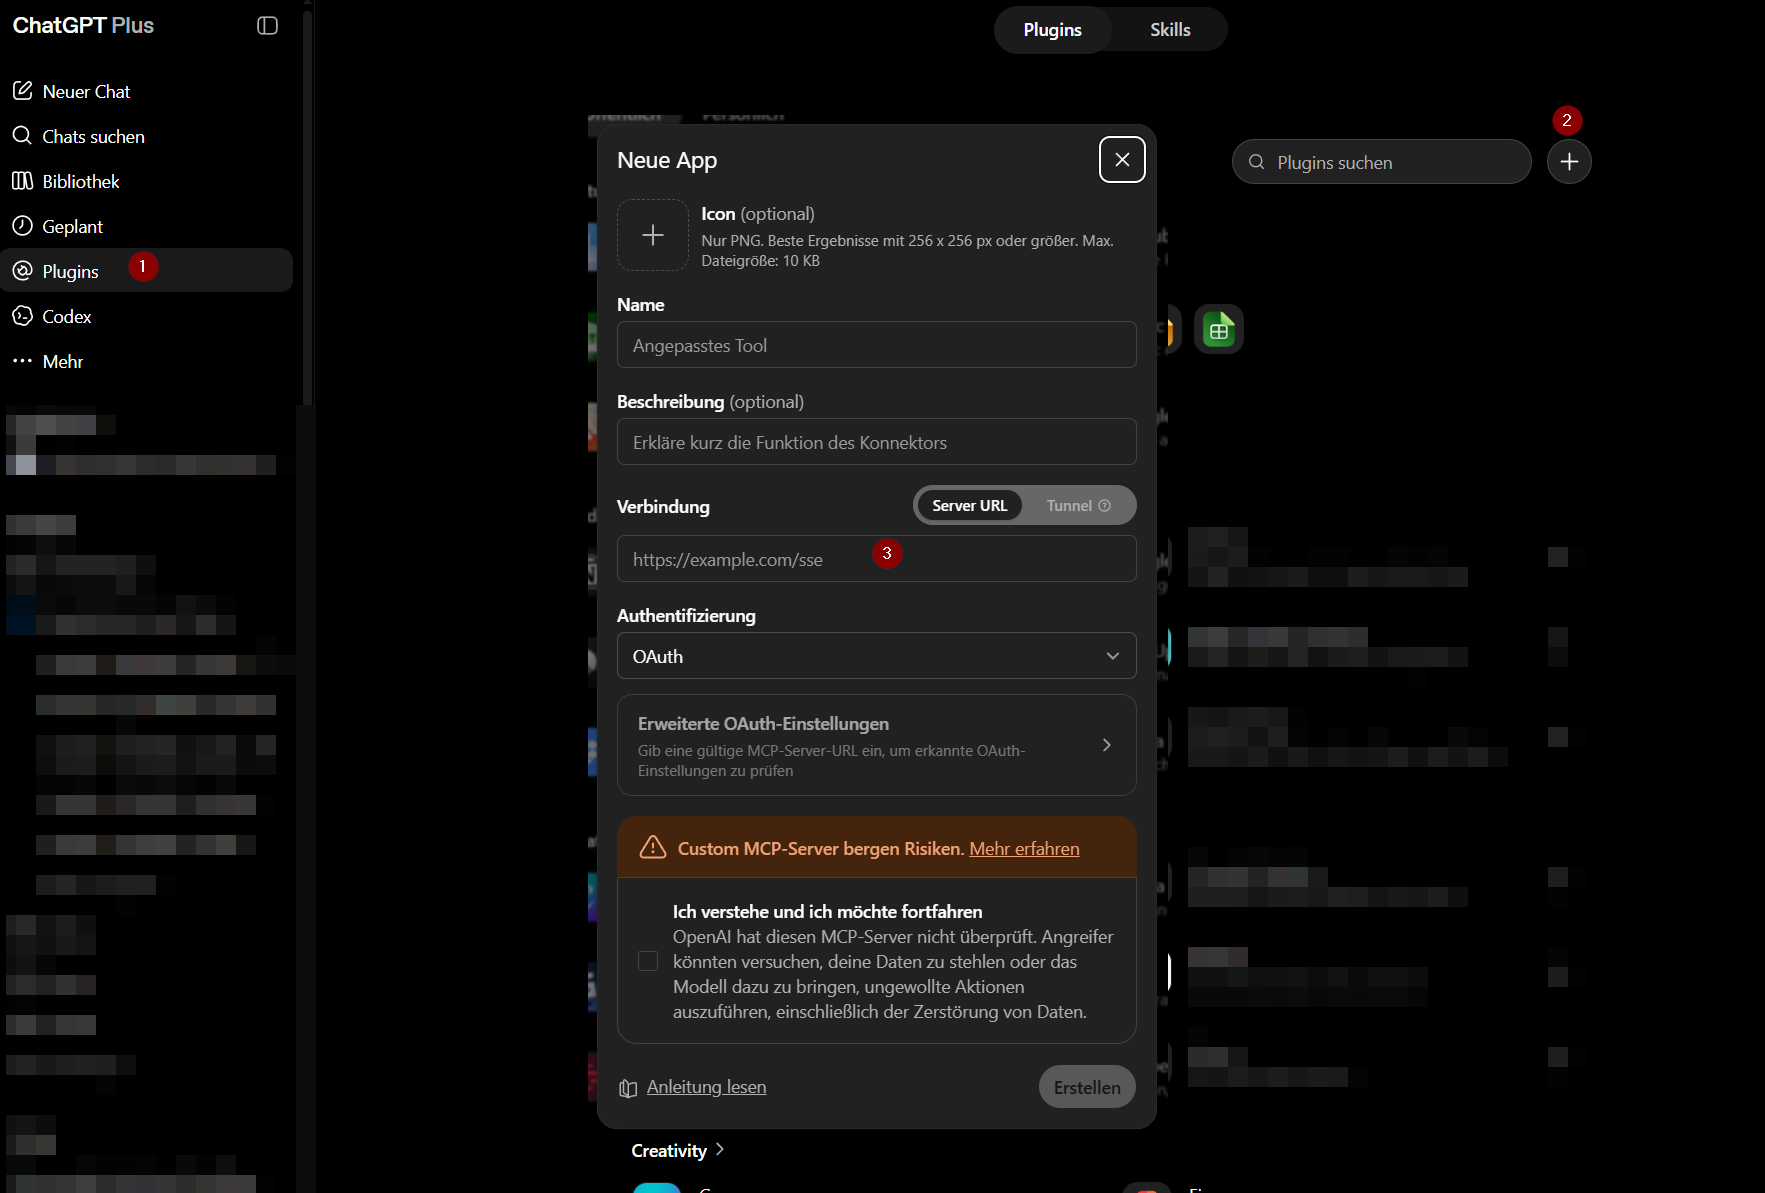
1) Create plugin (new)
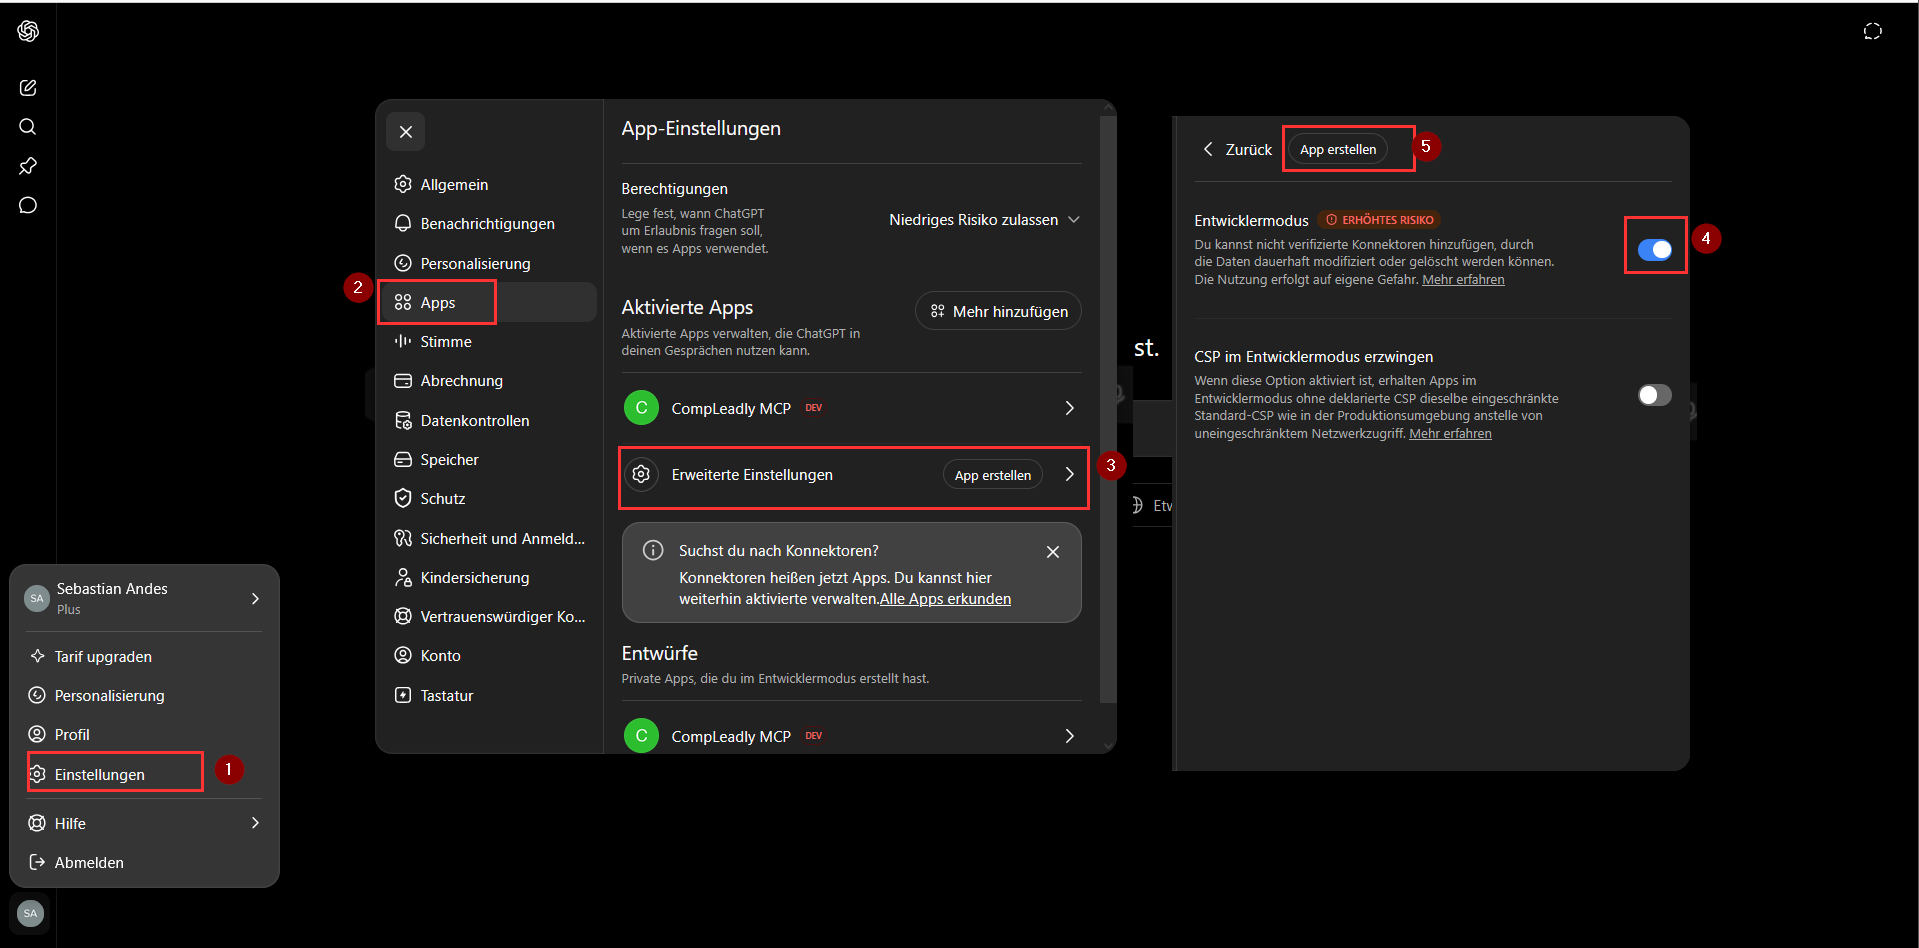
2) Create app (old)
The following screenshot shows the full path in the ChatGPT settings (red markers 1–5):
- Click Settings in the bottom-left corner.
- Go to Apps in the menu.
- Click Advanced settings.
- Enable developer mode (the “Increased risk” notice is normal — it is required because CompLeadly is not an app from the ChatGPT Store).
- Click Create app.
Then enter the following:
- Name: e.g.
CompLeadly MCP - Description: optional
- Server URL: paste the URL copied in step 2
- Authentication: leave OAuth selected
Confirm by clicking Create. The message “OpenAI has not reviewed this MCP server” is normal — we developed this server ourselves.
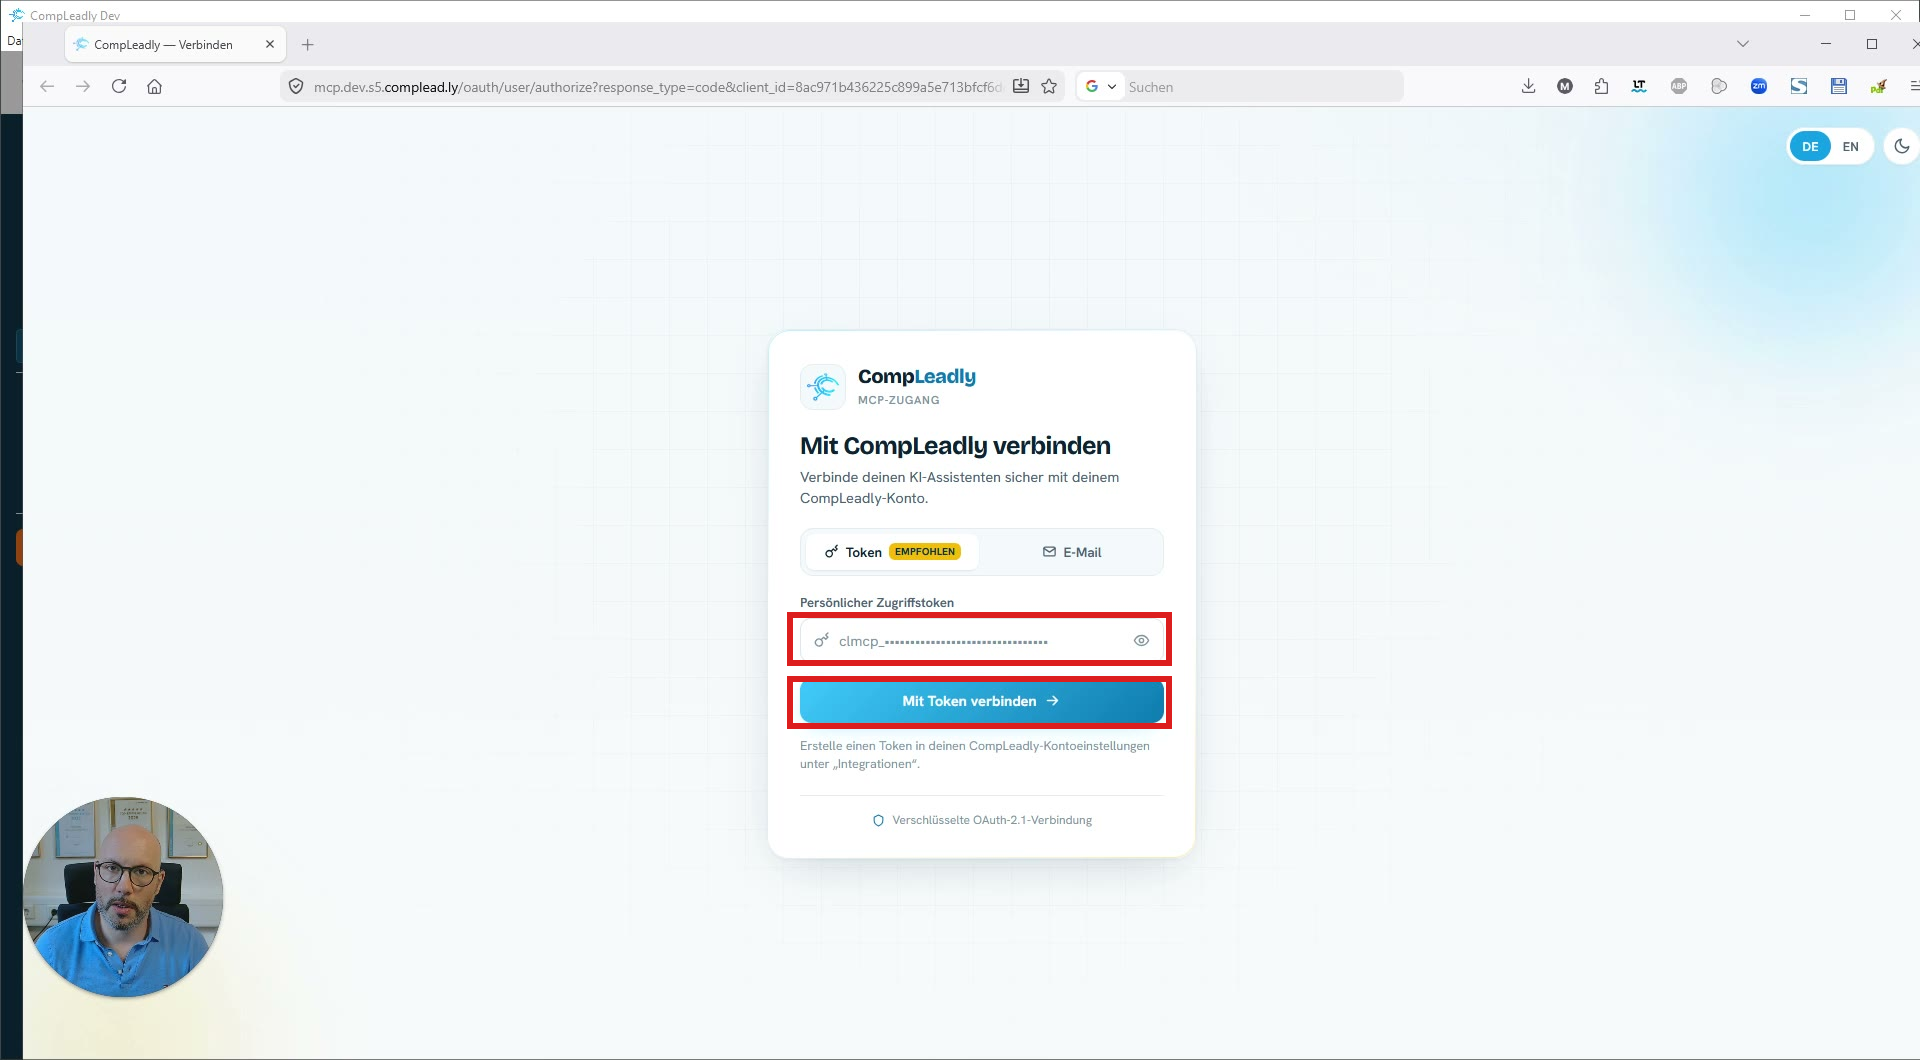
Step 6 – Sign-in screen: have your personal access token ready
The Connect to CompLeadly screen opens. You will need your personal access token here shortly. Create it directly in CompLeadly now (steps 7–8), then paste it here.
Step 7 – Create a new token in CompLeadly
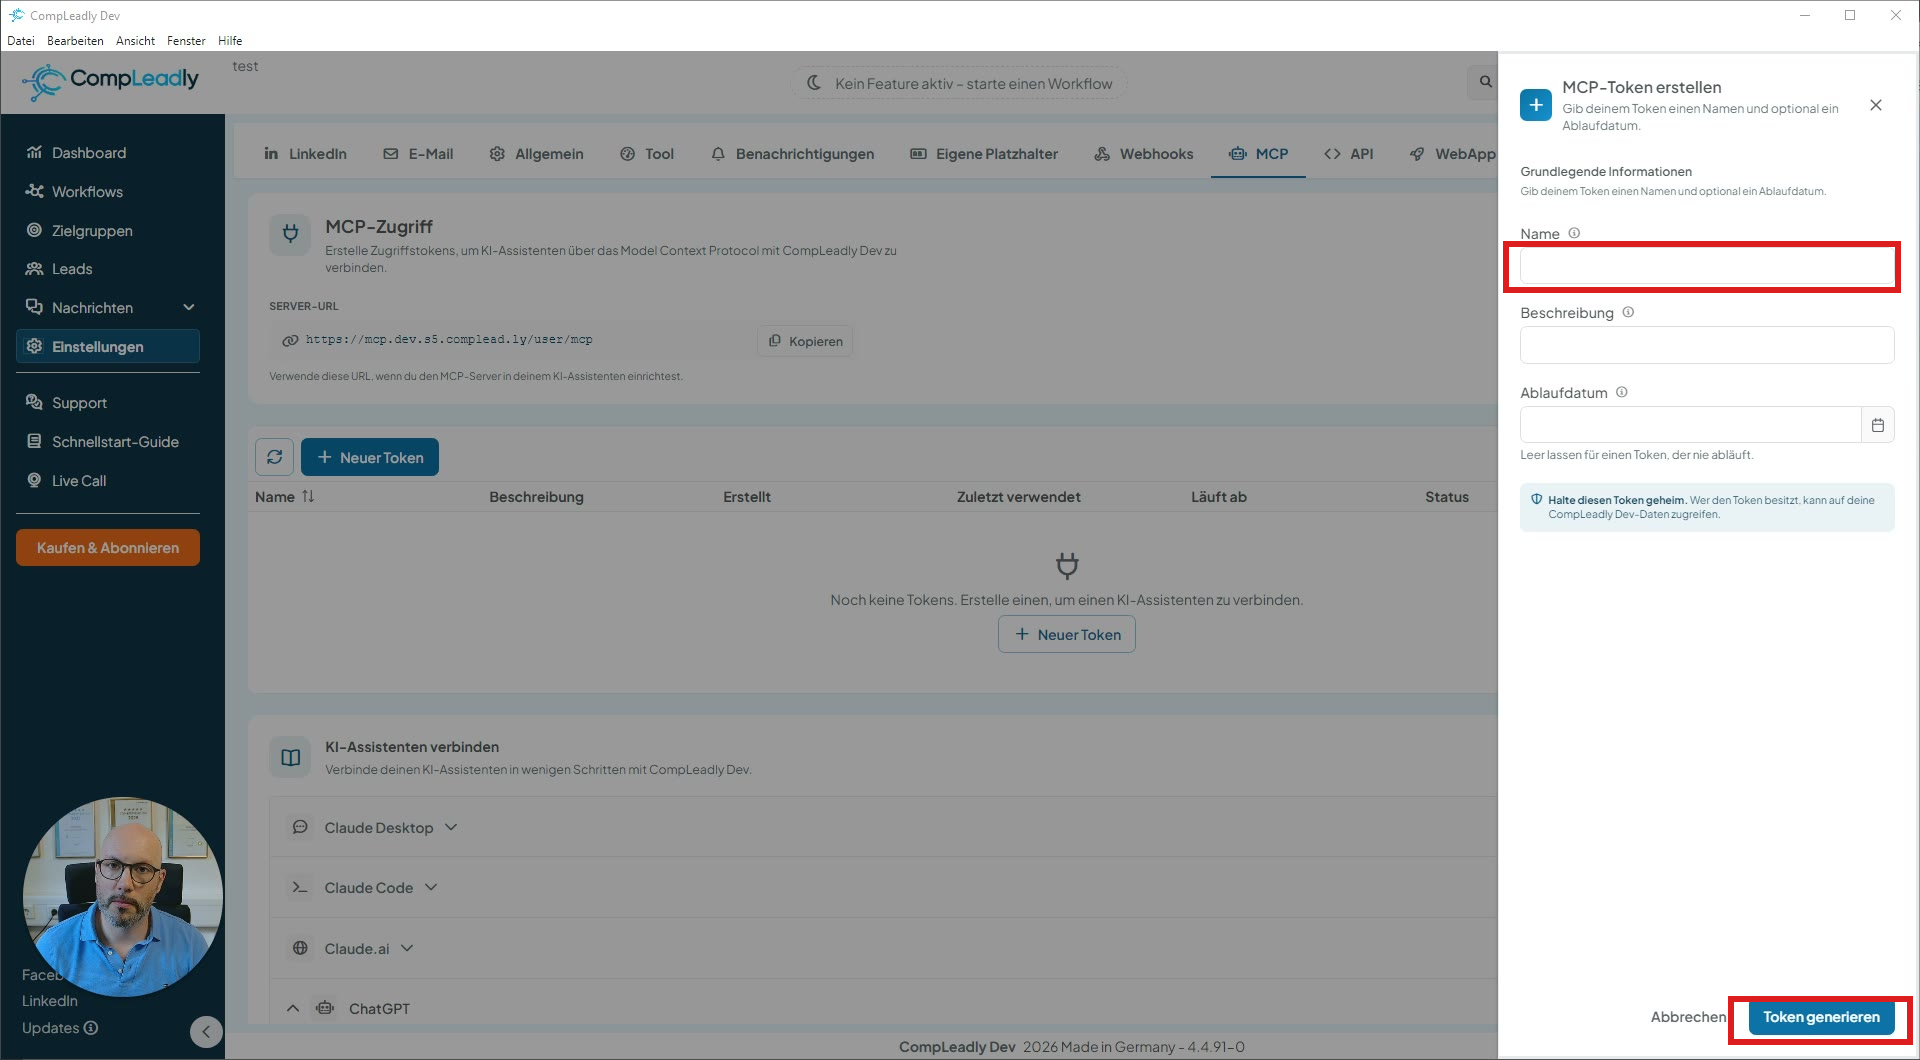
Go back to CompLeadly, open the MCP tab and click + New token.
Give the token a name (e.g. ChatGPT). You do not need to set an expiry date — leaving it empty means the token never expires. Then click Generate token.
Step 8 – Copy token (only possible once!)
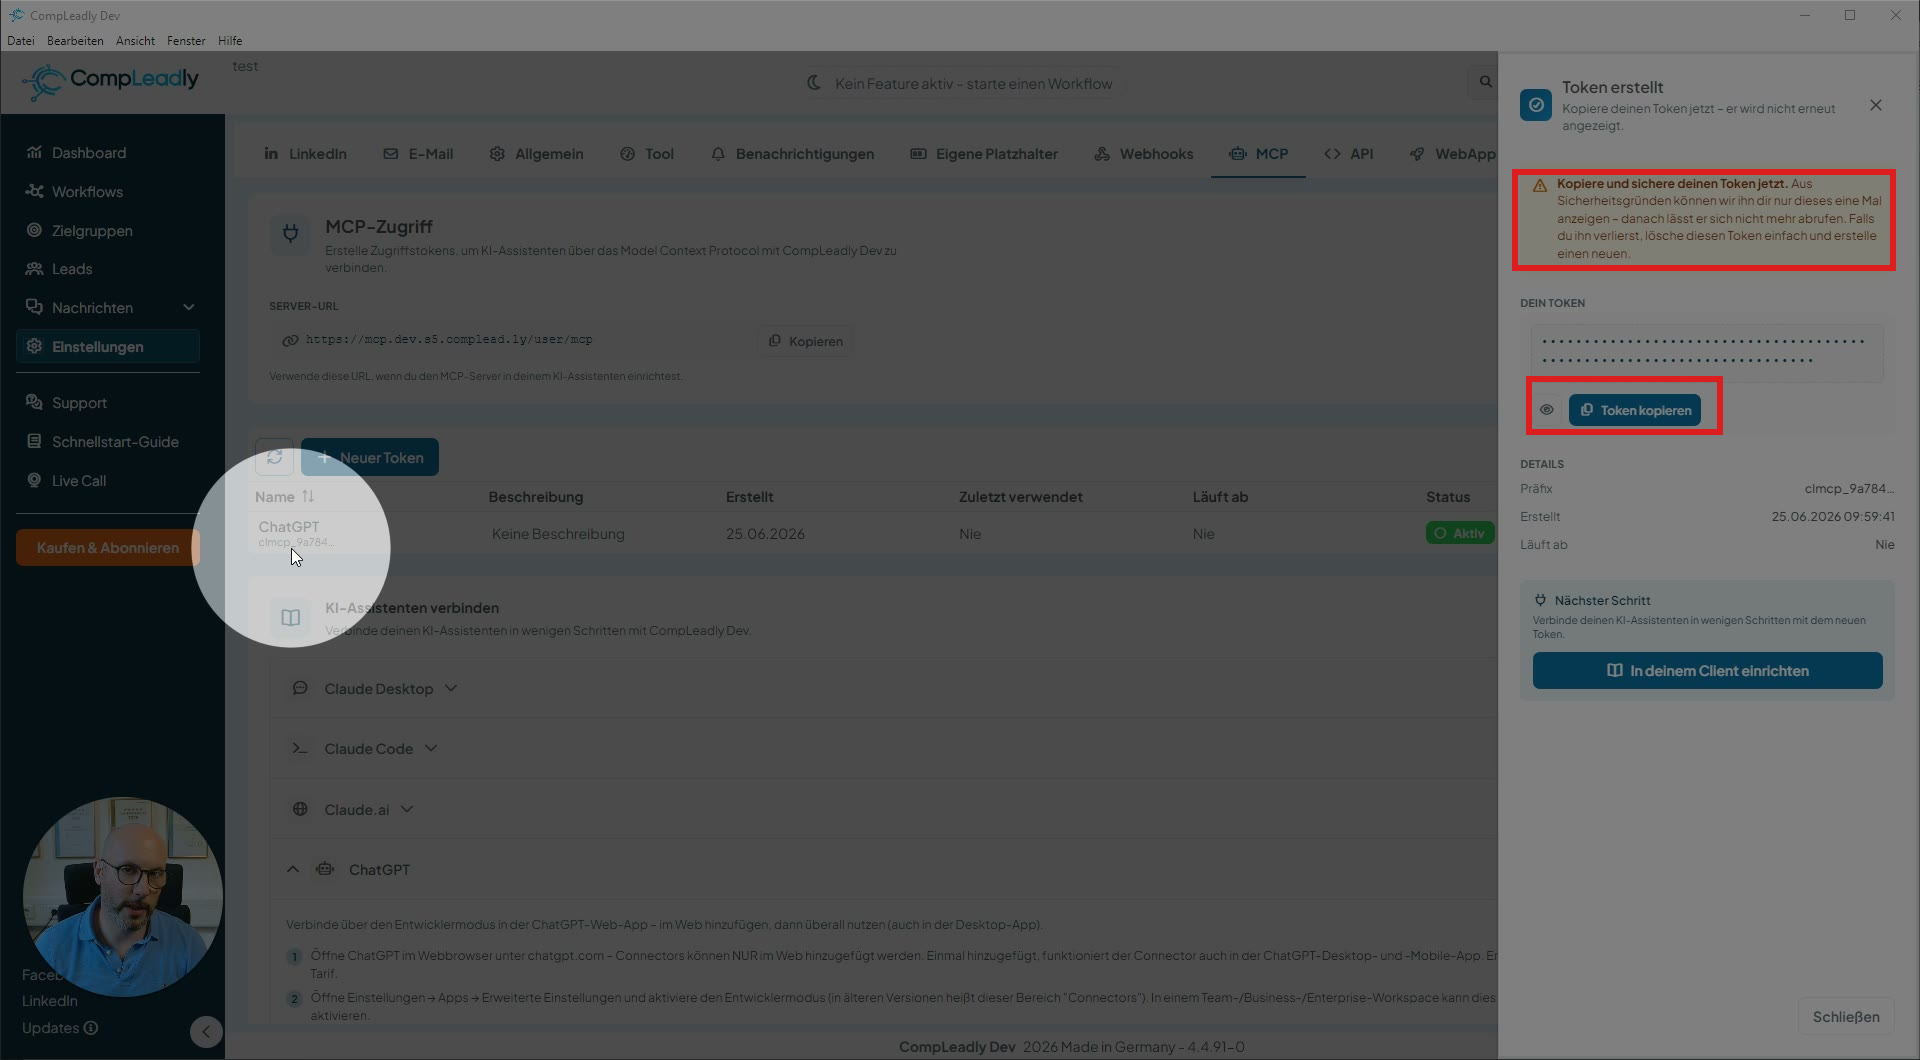
Click Copy token.
Note: For security reasons, the full token is only displayed once and cannot be retrieved afterwards. Copy it now. We recommend not storing it permanently anywhere — anyone who has the token can access your CompLeadly account. If you lose it, simply delete it and create a new one.
Step 9 – Paste and connect the token in ChatGPT
Return to the sign-in screen in ChatGPT, paste the copied token into the Personal access token field and click Connect with token.
Step 10 – Confirm connection
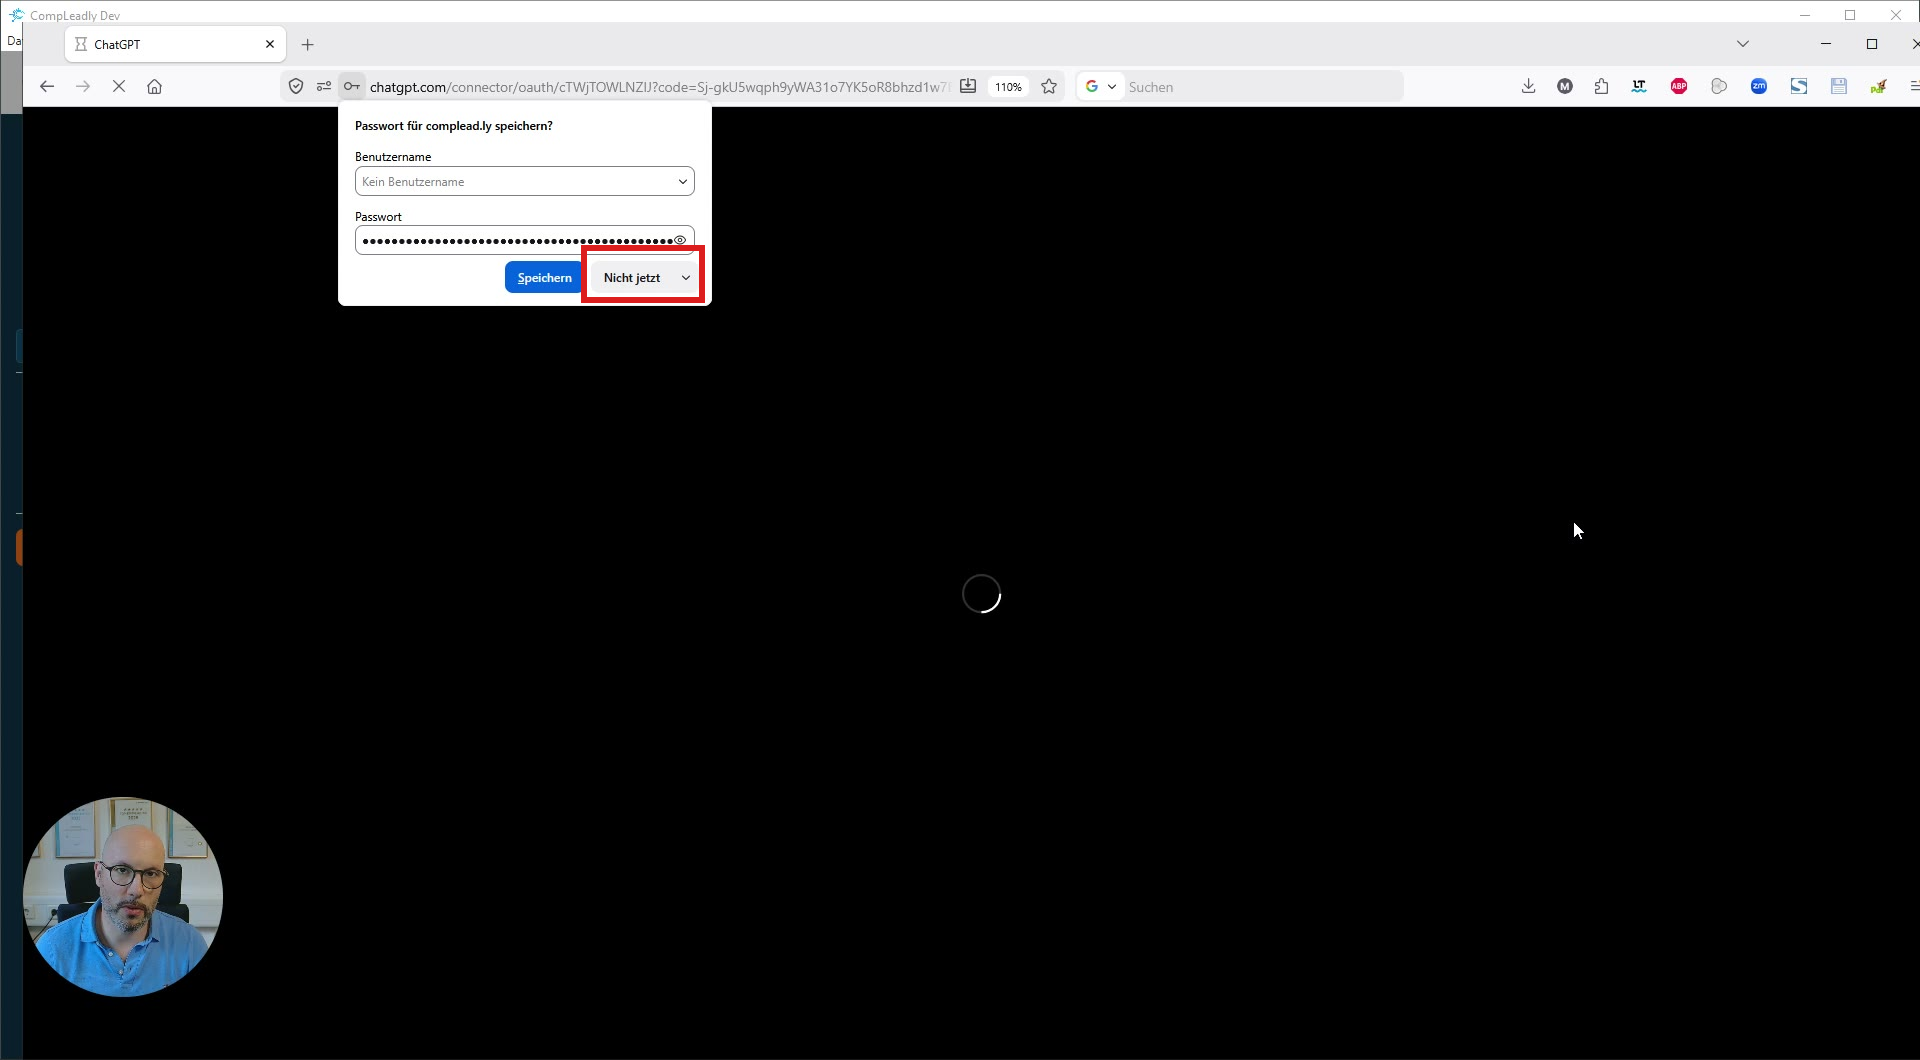
The connection will be established. If your browser offers to save the password, you can click Not now.
You will then see in CompLeadly that MCP is connected, and the enabled connector under Apps in ChatGPT.
Step 11 – Use in chat
Activate the connector in a new chat via the developer mode section in the input field. Tip: Type @CompLeadly and CompLeadly MCP will appear immediately.
Now you can get started, for example:
- “What access do I have?” – ChatGPT lists all available areas for you (workflows, target audiences, statistics, Smartchat, chat states, knowledge base …).
- “Why weren’t any requests sent?” – for technical review.
- “Which target audiences work best?” – for analysis.
Use case (AI appointment setting – fully automated)
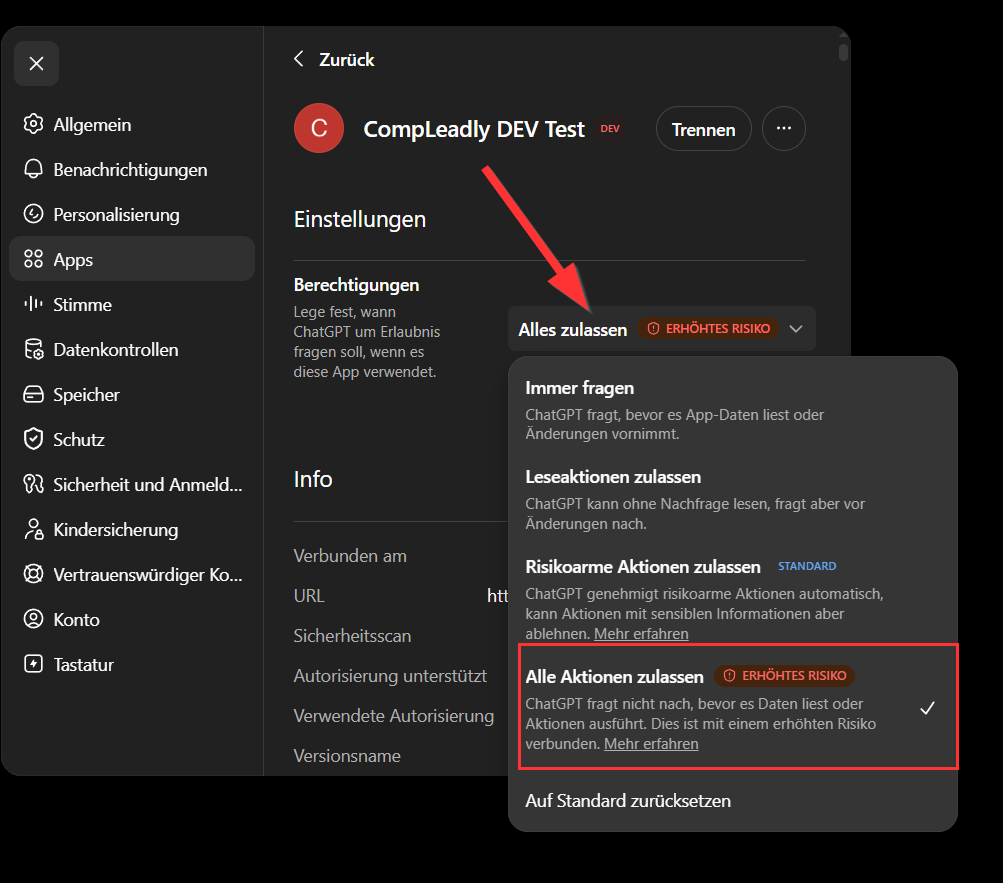
If the app keeps asking for permission, enable it.